
Point of Sale & payments
Ring up a sale in seconds, and take payment however the customer wants to pay.
Make a sale
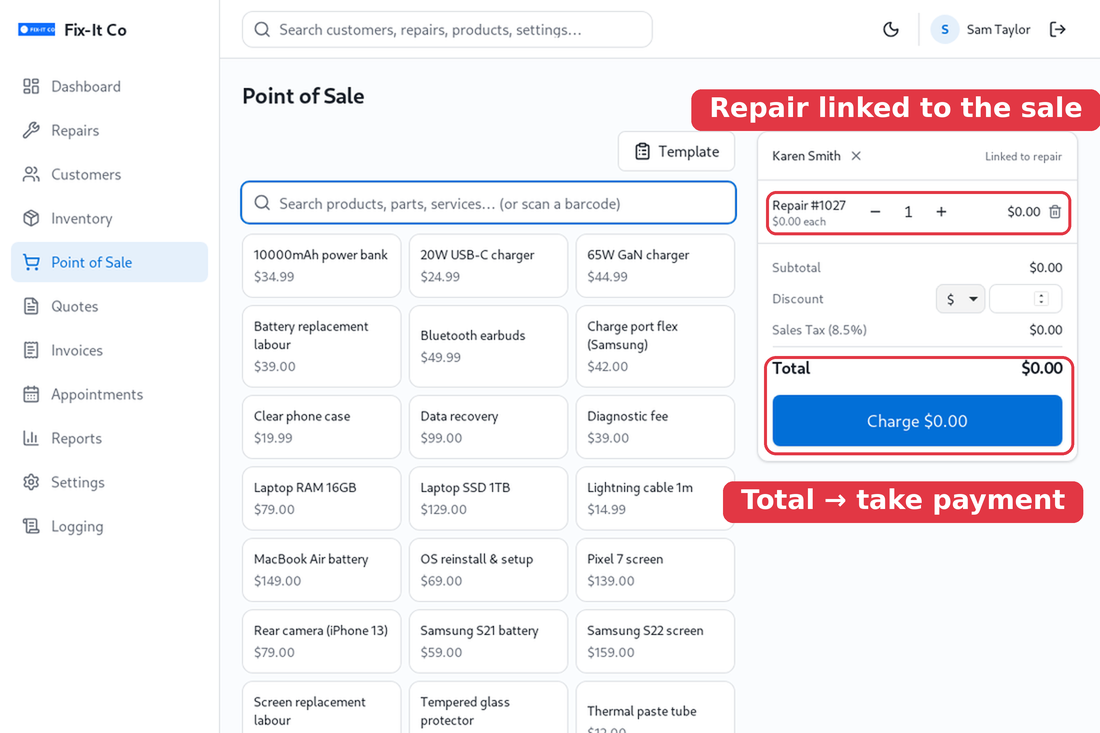
Open Point of Sale. Click on a product to add it to the cart, or scan a barcode - the scanner types into the search box and the matching product is added instantly. When you take payment for a repair, it’s linked to the sale automatically. Review the total and click on Charge.
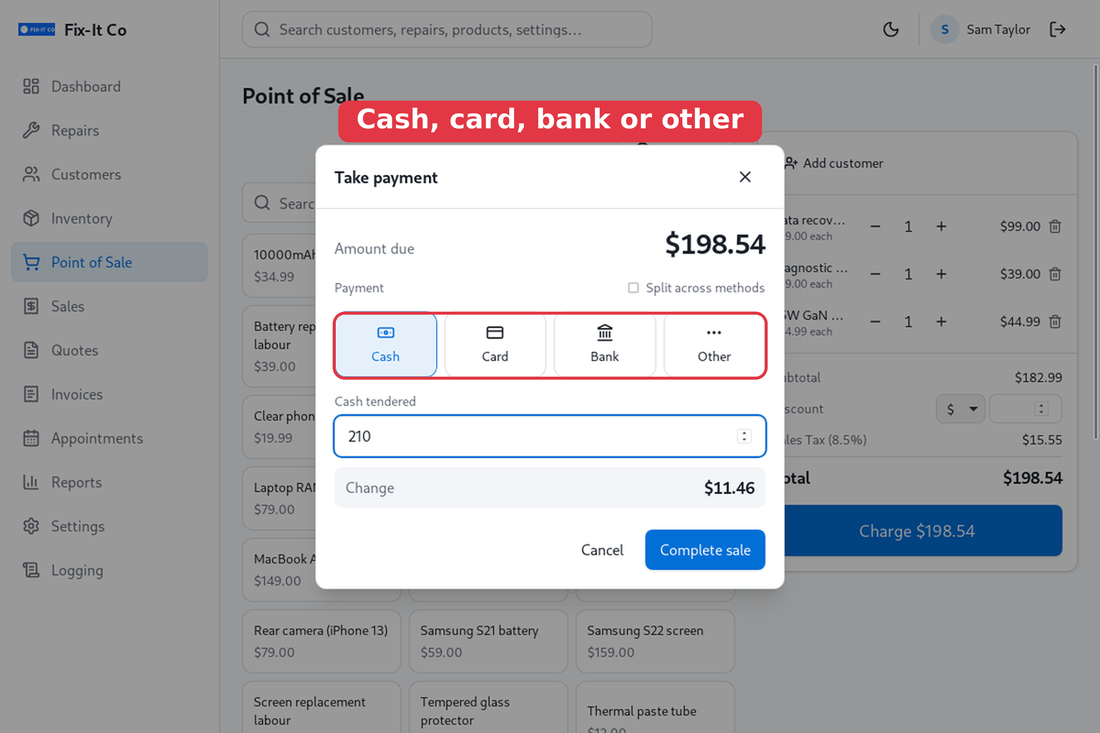
The Take payment window opens. Choose a Payment method - Cash, Card, Bank or Other. For cash, enter the amount in Cash tendered and Repair Shop works out the Change. Click on Complete sale.
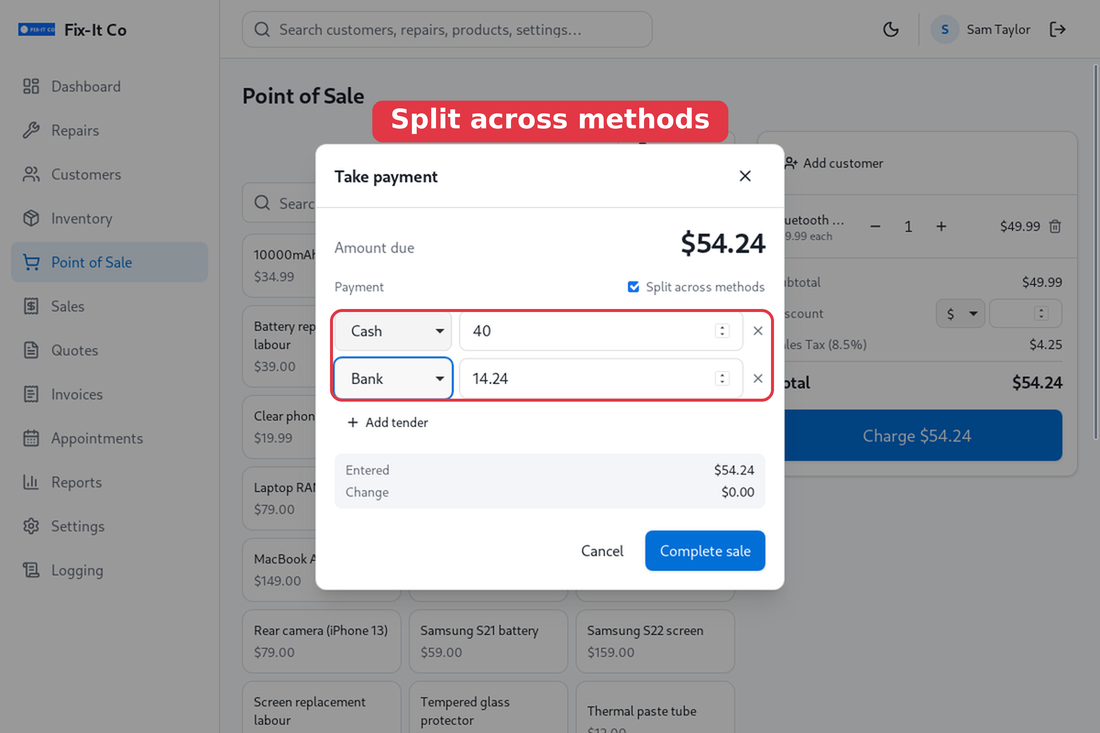
Splitting the payment. Taking part cash and part card (or any mix)? Tick Split across methods and add a row per tender - Repair Shop tracks what’s still owing until the total is covered, then records each tender on the sale.
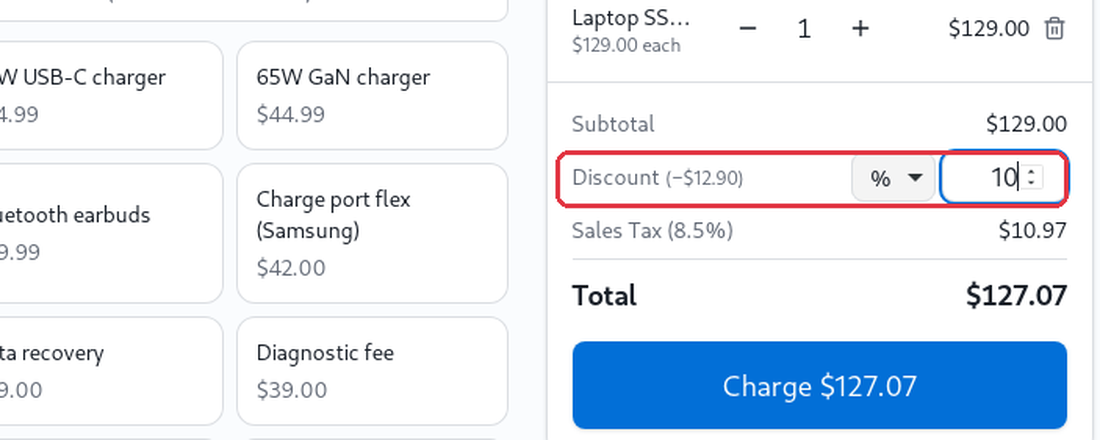
Giving a discount? In the totals panel, set the Discount as a fixed amount or a percentage - switch between the two with the small $ / % selector, then type the value. A percentage is worked out from the subtotal and shown next to the label (for example -$12.90), and the Total updates as you go. The same discount works on quotes and invoices.
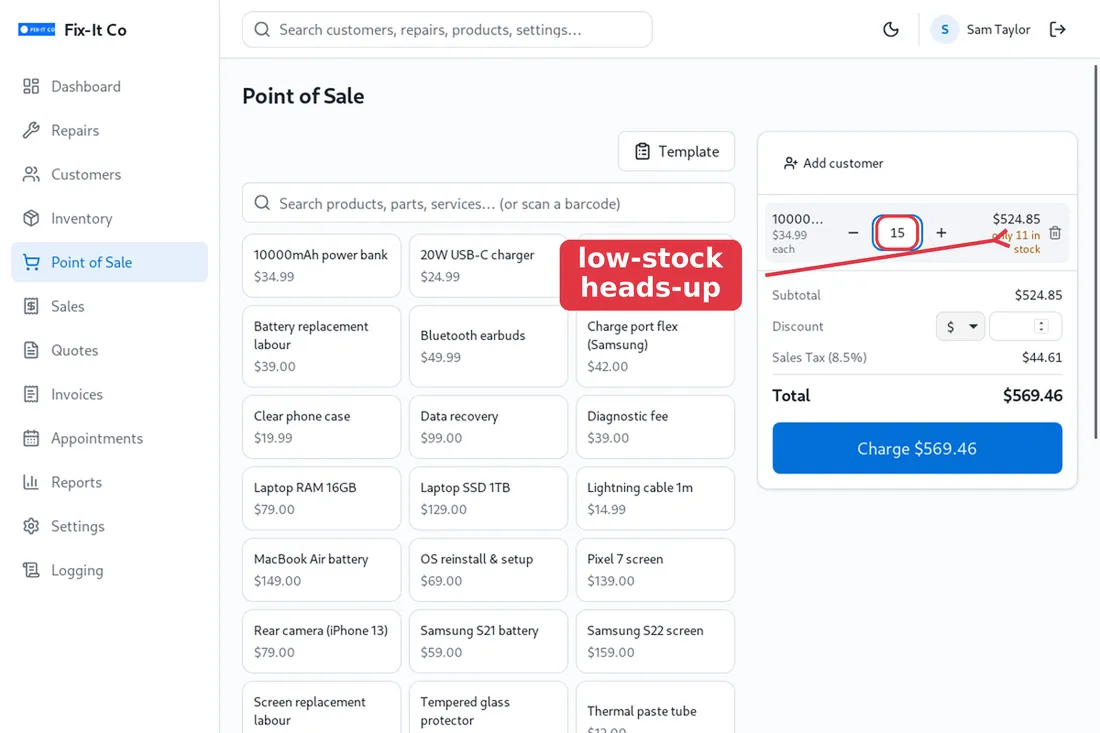
Quantities. Change how many of a line you’re selling by typing straight into the quantity box, or use the - and + buttons. If you ring up more than you have in stock, the line shows a small only N in stock note so you can check before you sell - it’s a heads-up, not a block, so you can still complete the sale - unless you’ve switched on Prevent selling below zero stock in Settings, which stops a sale that would take a tracked item below zero.
After Complete sale, the receipt opens ready to print. It lists what was paid on each method, and for a cash sale it also shows the Cash tendered and the Change given, so the customer has a clear record. Use Void / refund here if you need to reverse the sale.
Set up card payments
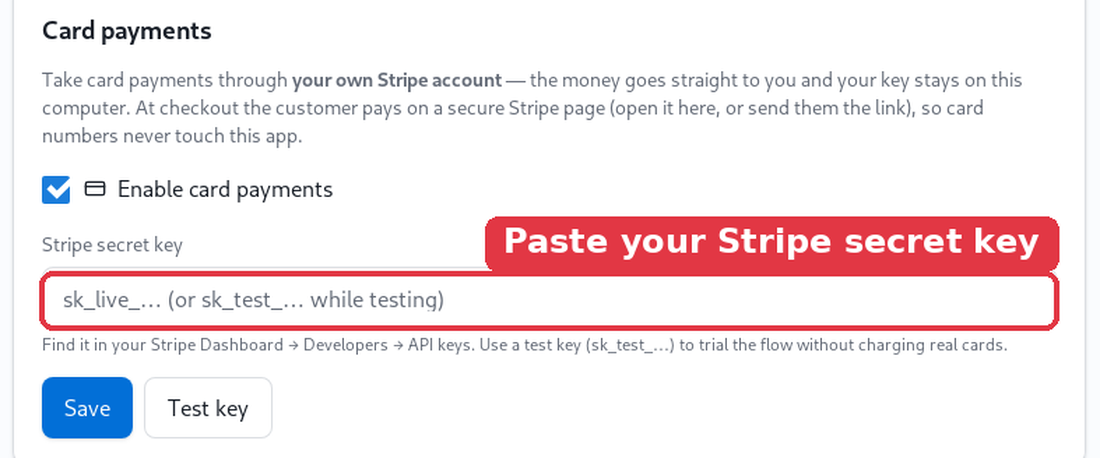
Card payments run through your own Stripe account, so the money goes straight to you and your key stays on this computer - card numbers never touch the app. In Settings → Card payments, tick Enable card payments and paste your Stripe secret key (find it in your Stripe Dashboard under Developers → API keys). Use a test key (sk_test_…) to trial the flow without charging real cards, then click on Test key to confirm it works.
Take a card payment
Choose Card at checkout to raise a secure, Stripe-hosted payment. A Card payment window opens with a payment link - click on Open payment page to take it on your own screen, Copy link, or send it straight to the customer with Text link or Email link. The window updates the moment they pay, and the sale or invoice is reconciled automatically.
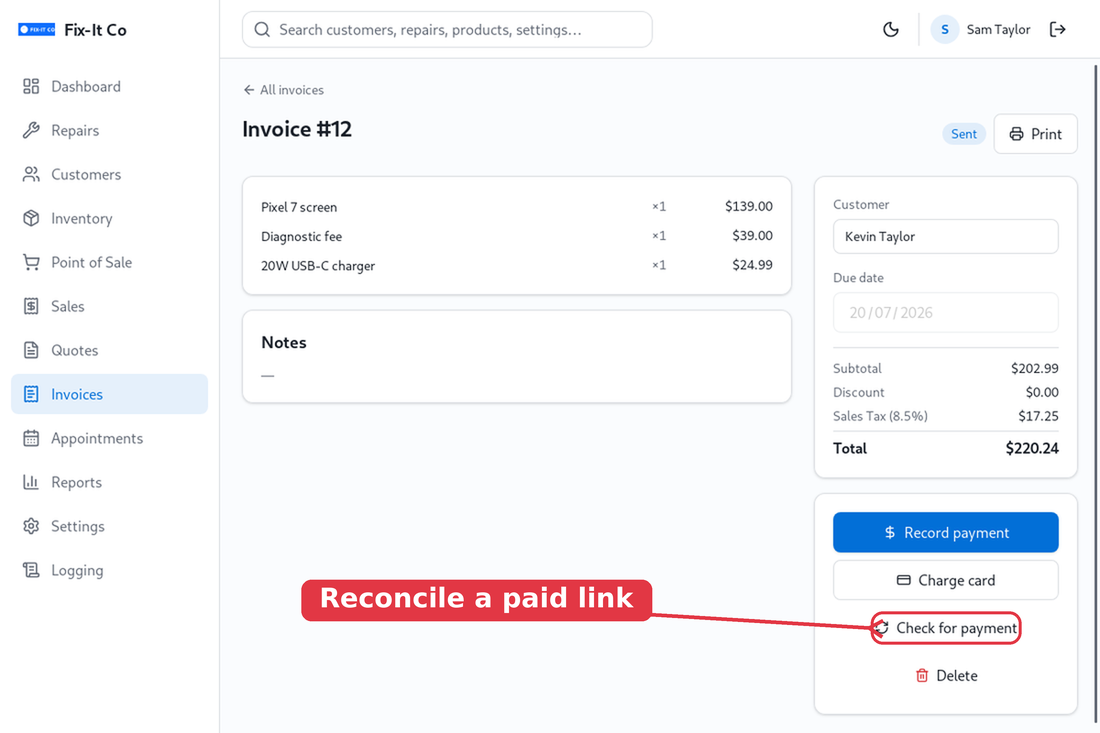
If a customer pays a texted or emailed link later - after you’ve closed the window - open the invoice and click on Check for payment to pull the payment in and update the balance.
Refunds. Every completed sale has a receipt. Open it from Sales and use Void / refund to reverse the sale - it’s recorded against the original so your totals and stock stay correct.