
Settings, staff & licence
Make Repair Shop yours - your details, wording, team and licence.
Shop details & wording
Set your shop name, contact details, logo and tax - these print on tickets, quotes, invoices and receipts. Under What you repair you can override the word the app uses for the items you fix (for example “instrument” or “drone”); leave it blank to use your trade’s default.

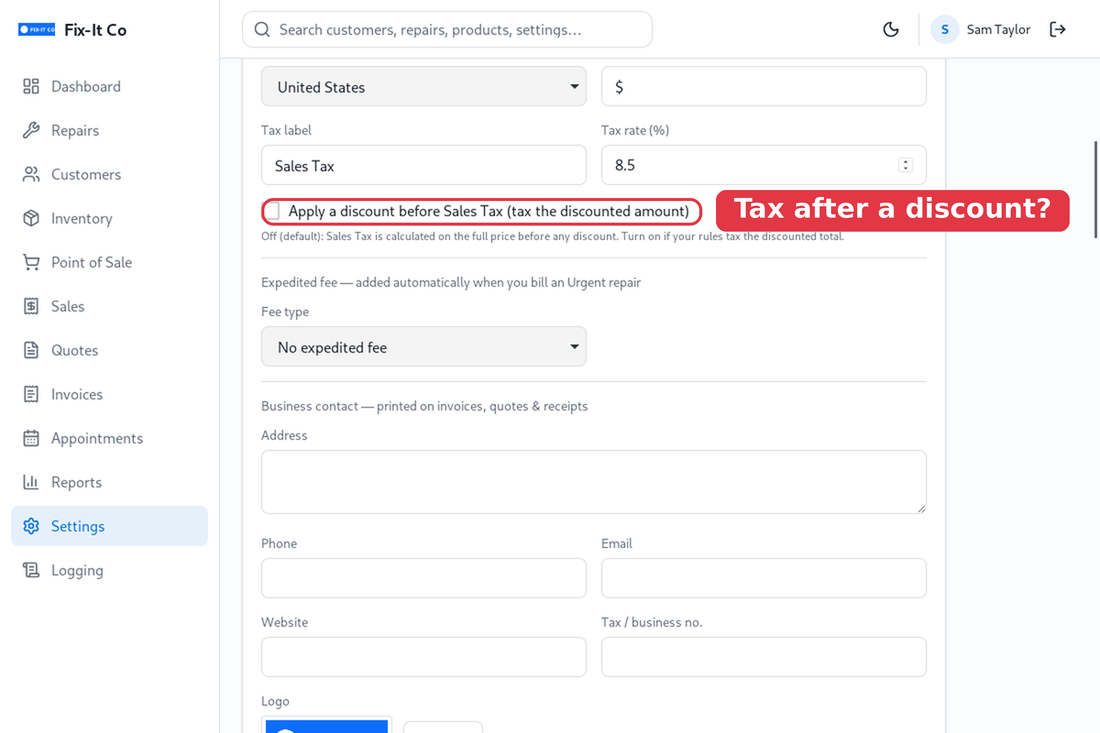
Tax and discounts. Set your Tax label (for example “Sales Tax” or “GST”) and Tax rate. By default, tax is worked out on the full price before any discount. If your rules tax the discounted amount instead, tick Apply a discount before tax - the discount then reduces the taxable amount first, both at the Point of Sale and on invoices.
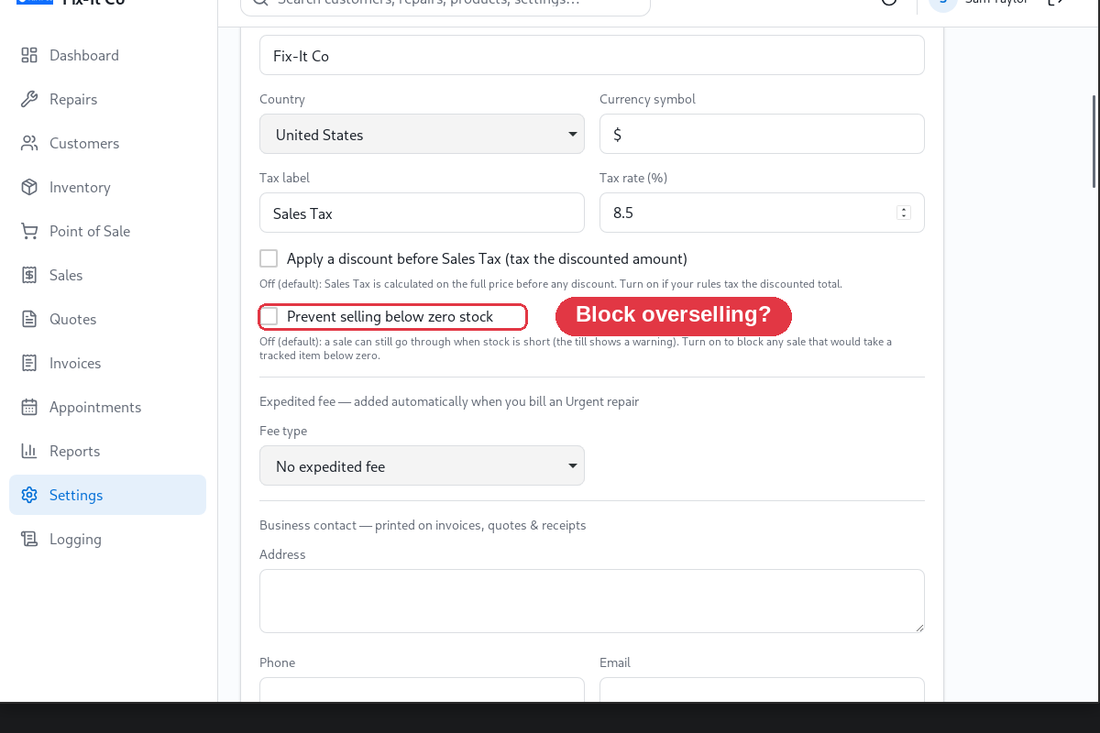
Selling below stock. By default a sale still goes through when an item is short - the Point of Sale shows an “only N in stock” warning so you notice, since shop counts often drift. If you’d rather stop it, tick Prevent selling below zero stock and Repair Shop refuses any sale that would take a tracked item below zero. Click on Save changes.
Expedited fee (rush jobs)
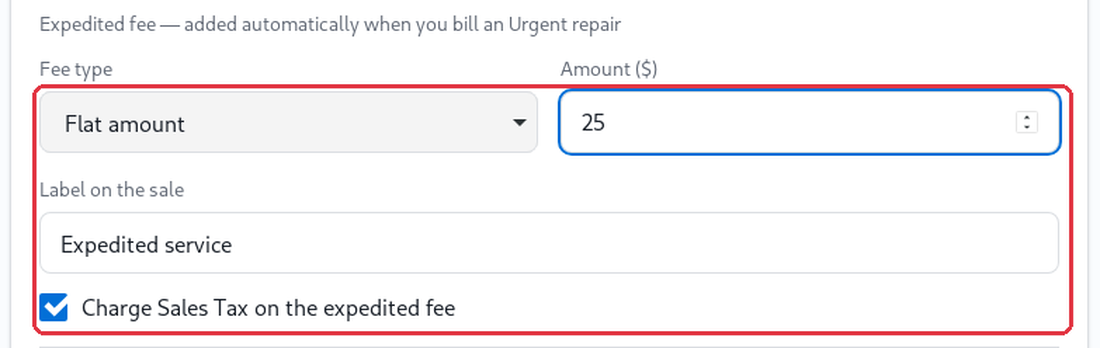
Charge extra for a rush job. In Settings → Shop details, find Expedited fee and choose a Fee type - a Flat amount (a fixed sum) or a Percentage of repair - then set the Amount. You can rename the Label on the sale (it defaults to Expedited service) and tick whether to charge tax on it. Click on Save changes. Leave the type on No expedited fee to switch it off.
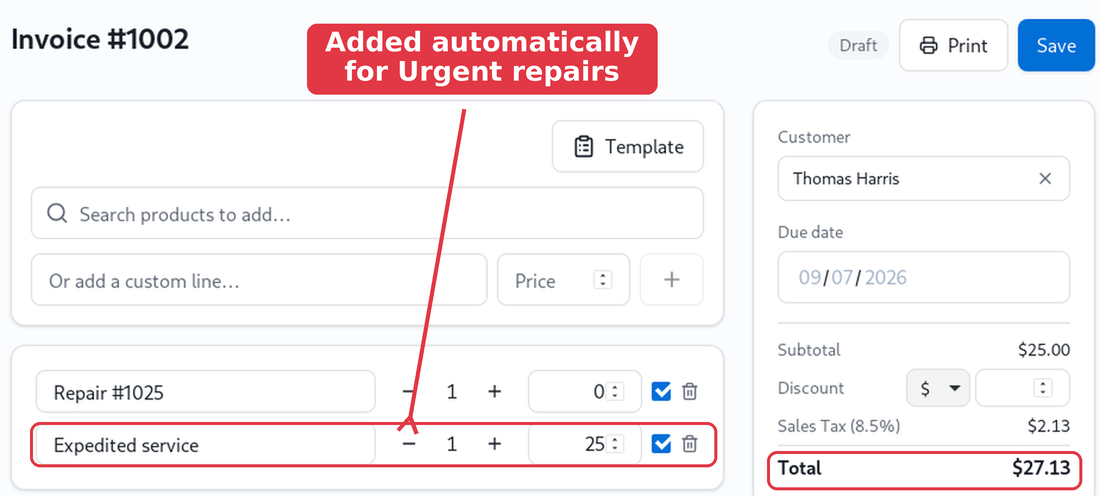
The fee is added automatically whenever you bill a repair whose Priority is Urgent - both when you raise an Invoice from the repair and when you Charge it through the Point of Sale. It arrives as a normal line you can edit or remove before taking payment. For example, a $25 flat fee adds an Expedited service line at $25.00 (so a repair invoice subtotals $25.00 with $2.13 tax, a $27.13 total); a 10% fee instead charges 10% of the repair and keeps recalculating as you edit the bill.
Staff & roles
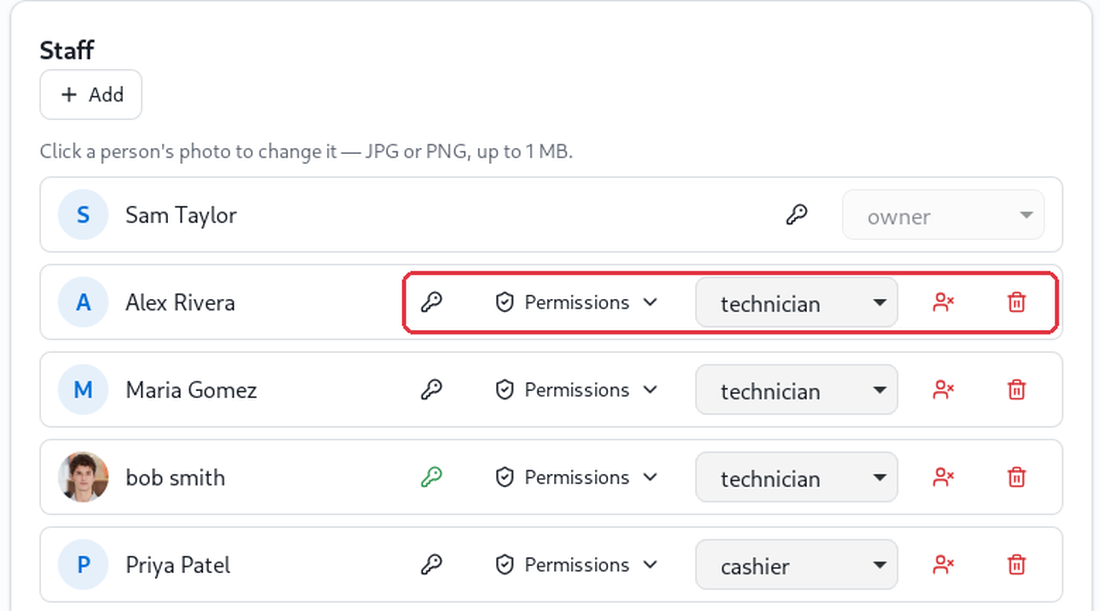
Add your team under Staff with Add. Give each person a role - owner, manager, technician or cashier - which sets sensible defaults, then open Permissions to fine-tune exactly which areas they can reach. Set a sign-in password with the key icon, and click on a person’s photo to add one (JPG or PNG, up to 1 MB). Each person then appears on the sign-in screen. When someone leaves, Deactivate their account (the person-with-a-cross icon beside their role) - it keeps their history but immediately stops them signing in, even with their password; the bin icon removes them for good. Owner accounts can’t be deactivated, and the last owner can’t be removed, so you’re never locked out of your own shop.
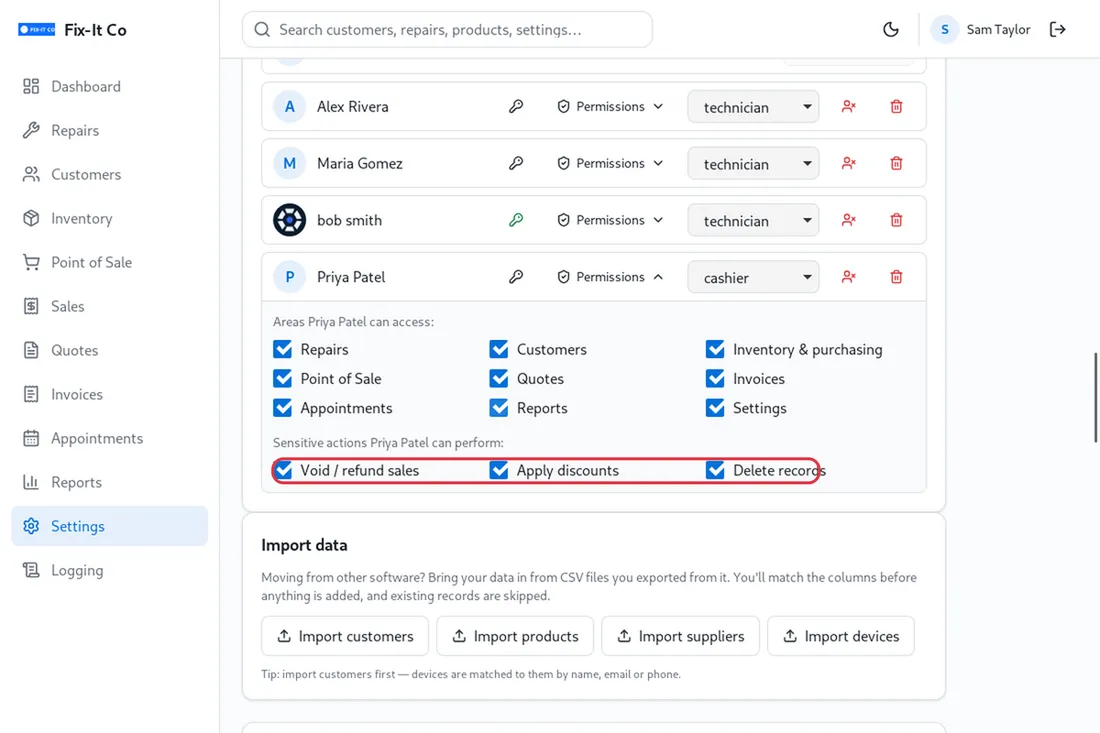
Sensitive actions. Under a person’s Permissions, below the areas, you can also withhold three sensitive actions even within an area they otherwise use: Void / refund sales, Apply discounts and Delete records. Delete records covers deletions across the whole app - customers, repairs, quotes, invoices, suppliers, purchase orders, appointments, reminders, signatures and attachments - so a person without it can’t delete or merge any of them; the Delete and Merge buttons simply don’t appear for them. Untick one and they’re stopped from doing it - so, for example, a cashier can ring up sales but can’t reverse them or give a discount without a manager. Owners can always do everything.
Import data
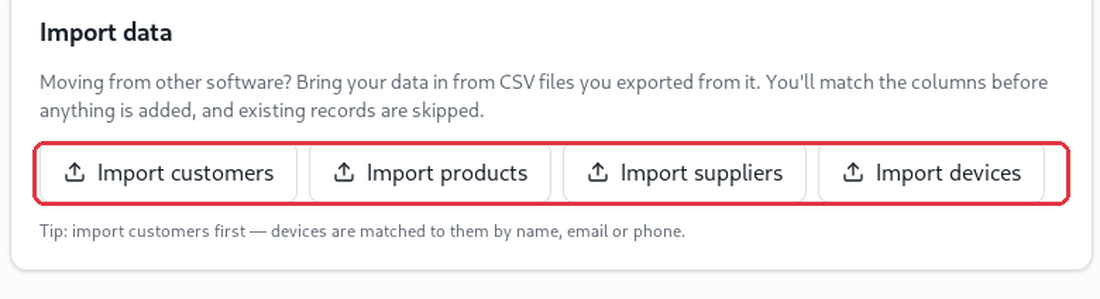
Moving from other software? Under Import data, export your old data to .csv files, then click on Import customers, Import products, Import suppliers or Import devices. Import customers first - devices are matched to them by name, email or phone. Existing records are skipped, so it’s safe to run an import more than once.
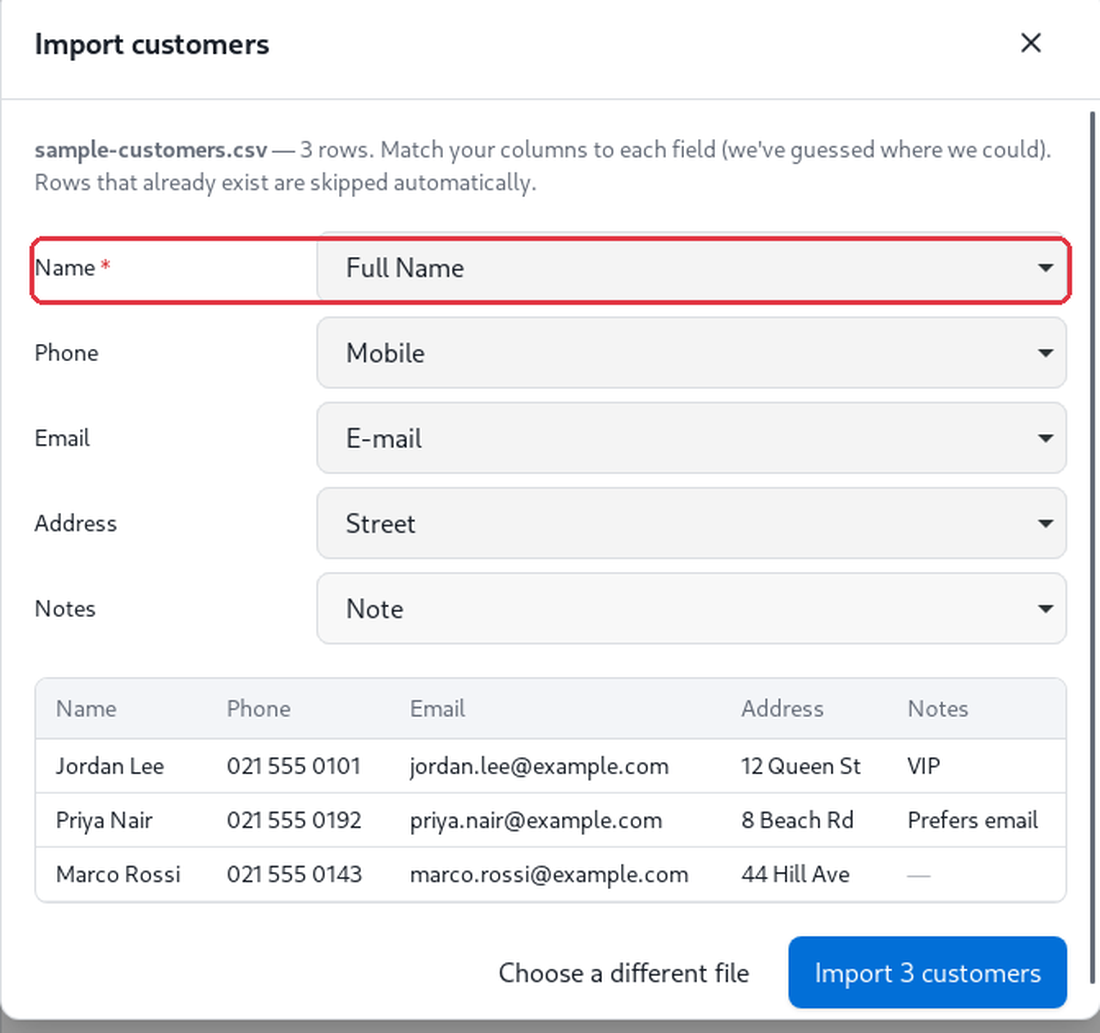
Choose your .csv (its first row must be the column headings) and Repair Shop opens a column-matching screen. It guesses each match from your headings - fix any with the dropdowns, check the preview, then click on Import. The exact column order doesn’t matter, and any columns you don’t need are ignored. Fields marked ★ are required.
Repair Shop recognises the columns below (common variations of each name are matched for you, so “Mobile” or “Cell” both feed Phone). ★ marks the one required column for each import.
| Customers | Name ★, Phone, Email, Address, Notes |
|---|---|
| Products | Name ★, SKU / code, Barcode, Description, Sell price, Cost price, Stock on hand, Reorder level, Type |
| Suppliers | Name ★, Phone, Email, Notes |
| Devices | Customer name ★, Device ★, Customer email, Customer phone, Type, Serial, IMEI, Brand, Model, Notes |
Signature terms
Under Signature terms, edit the Drop-off (intake) terms and Collection (pickup) terms that customers agree to when they sign on a repair. Use {shop} for your business name, then click on Save terms. These appear above the signature pad and on the printed ticket.
Card payments
Connect your own Stripe account to take card payments - see Point of Sale & payments for the full walkthrough.
Data & backups
Everything you do lives in one encrypted file on this computer. As the owner, protect it against a lost or broken PC by taking regular backups from Settings → Data & backups. This panel is owner-only.
Create an encrypted backup. Type a backup passphrase (at least 6 characters) and click on Create backup. Repair Shop writes a portable, encrypted copy of your whole database into a backups folder and shows you where - click on Show to open it. Keep a copy off this computer (a USB stick or a cloud folder), and store the passphrase somewhere safe: it protects the backup and cannot be recovered.
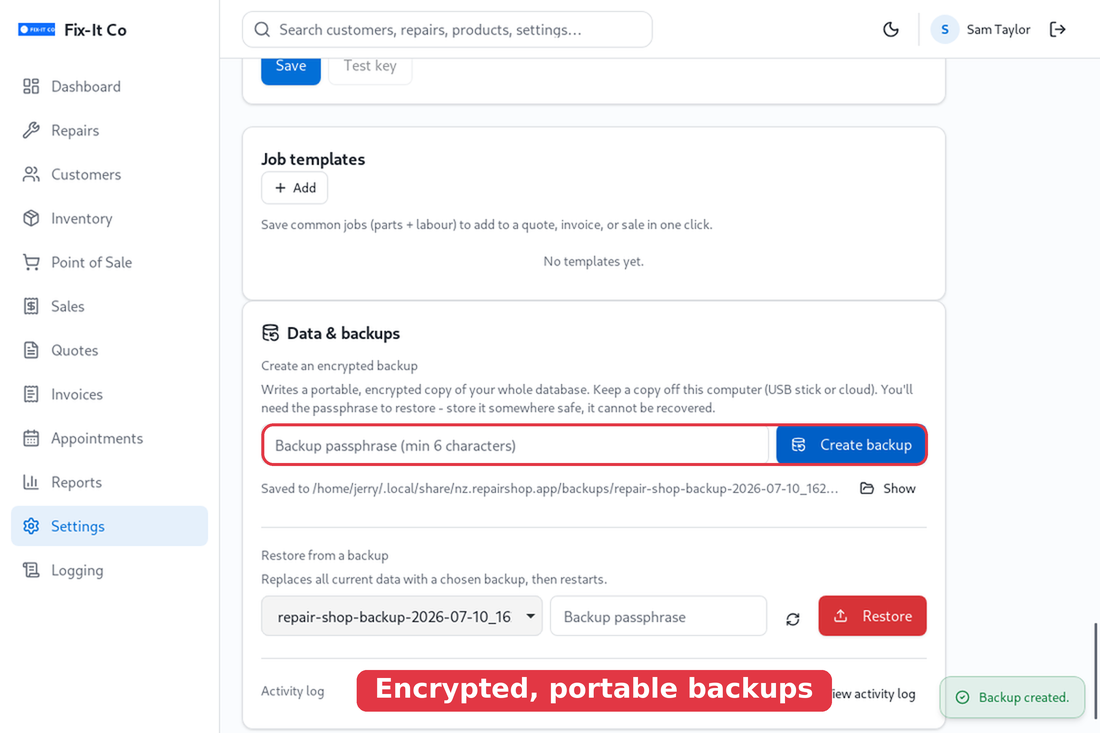
Restore from a backup. Under Restore from a backup, choose a backup file, enter its passphrase, and click on Restore. Repair Shop checks the passphrase, then replaces all current data with the backup and restarts. This can’t be undone, so take a fresh backup first if you’re unsure.
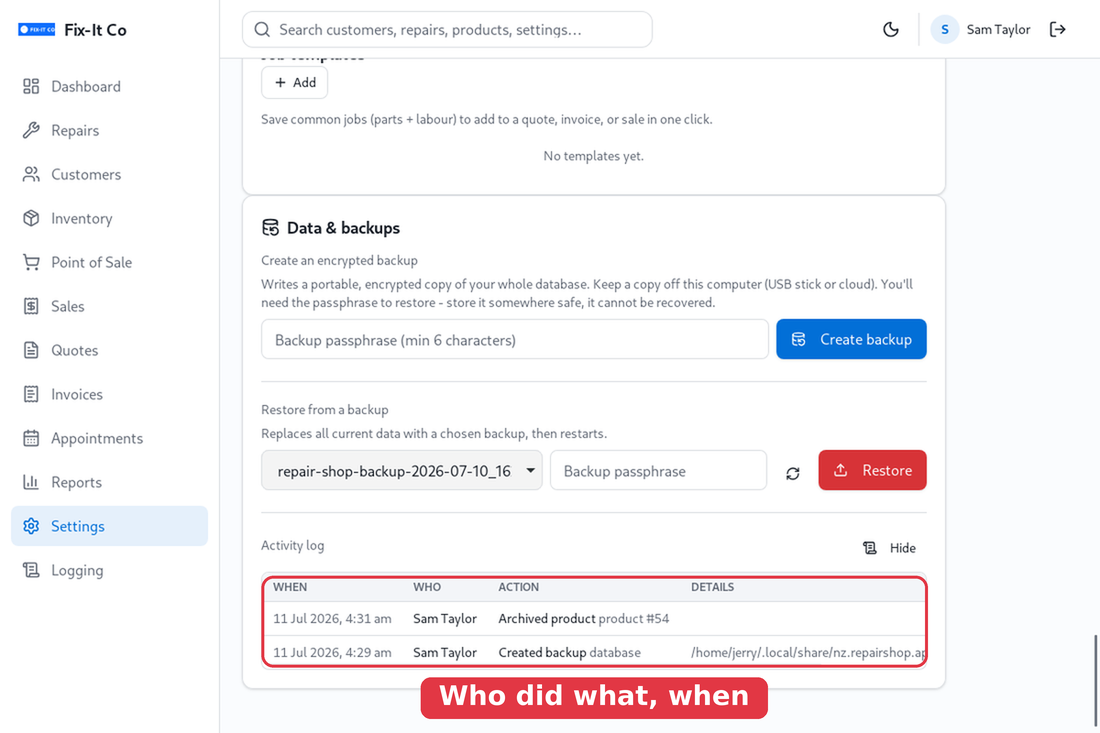
Activity log. Click on View activity log for a dated record of sensitive actions - voids and refunds, deletions, staff, permission and password changes, settings changes, imports and backups - each showing who did it and when.
Software updates
Repair Shop keeps itself current. Whenever you’re online it quietly checks for a new version in the background; if one is ready, a slim bar appears across the top of the app. Click on Update now and Repair Shop downloads the update, installs it and restarts into the new version. Only the app is replaced - your customers, repairs and settings are untouched.
You can also check whenever you like. At the top of Settings, a panel shows the version you’re running (for example Repair Shop v0.1.0). Click on Check for updates - it either confirms You’re on the latest version or offers the newer one with Update now.

A few things worth knowing: updates are included with your subscription; every update is digitally signed and verified before it installs, so you always get the genuine build direct from us; and on Windows the Microsoft Store delivers updates for you, so a check there simply confirms you’re up to date.
Activating your licence
Repair Shop asks for your licence key once. It checks in with our activation server a single time to bind the licence to your computer, then works offline from then on. Your subscription keeps the licence active; if it ever lapses you get a grace period where everything still works normally, and only after that does the app switch to read-only - you never lose access to your data (you can still open, export and back it up), you just can’t make changes until you renew. Moving to a new PC? Use Move to a new computer to free this machine’s seat. Manage your subscription any time at getrepairshopsoftware.com.